Jekyll2026-06-19T13:02:05+02:00http://localhost:4000/OpenVMSBlog/feed.xmlOpenVMS BlogThis is a blog where I write about OpenVMS and related subjects.The Shell and Creating Users2026-06-13T01:00:00+02:002026-06-13T01:00:00+02:00http://localhost:4000/OpenVMSBlog/DCLUsersNote that absolutely none of this is authoritative or directly based on relevant documentation. It’s mostly what I found and figured out and guessed and (in some cases) made up. Some of it may be wrong or dangerous or lead to disaster or confusion. I am not taking responsibility here for anything, not even spelling or good taste. Read and act on it at your own peril!
OpenVMS 9.2 supports, as far as I can tell, three types of terminals:
Console with device name OPA0: which stands for Operator Console A0
Serial cable connections with devices names like TTA0: (Teletype A0)
Secure shell connections like FTA0: (apparently Fast Terminal A0)
X11 can also be used with ssh or XDM but OpenVMS terminal servers for GUI applications are exceedingly rare.
If ssh is configured (see System Installation), the terminal will be FTA0:. Further ssh connections will be FTA1: and so on.
OpenVMS treats drives as devices in the same vain. The first hard drive is DKA0:.
OpenVMS uses a different shell than Unix and Windows and a different path delimiter. While Unix uses “/” and Windows uses “\”, OpenVMS uses a dot “.”.
Thus, while in Unix a user’s home directory could be located at
/home/benoit/
and in Windows his profile directory could be at
C:\Users\benoit
in OpenVMS the login directory could be
DKA0:[USERS.BENOIT]
Note that OpenVMS uses a device name like Windows uses a drive letter. Also note that since OpenVMS traditionally prefers upper-case over lower-case (but file and path names are case-preserving).
The OpenVMS shell is (typically) the Digital Command Languages, DCL. It is a rather old shell and was already used in OpenVMS’ predecessors in the early 1970s. It has some surprisingly modern features and follows many surprisingly ancient rituals.
It is customary to document shell commands in all upper-case. Like in Windows PowerShell, shell commands can be abbreviated but in scripts should be written out.
Let’s start a session as the system user.
Welcome to OpenVMS (TM) x86_64 Operating System, Version V9.2-3

    Last interactive login on Saturday, 13-JUN-2026 16:23:10.87
    Last non-interactive login on Wednesday, 17-NOV-1858 00:00:00.00
$
VBVMS2::SYSTEM 16:33:15   (DCL)   CPU=00:00:00.04 PF=307 IO=88 MEM=264
$
I don’t know why system’s last non-interactive login was in the mid-1800s.
The information line VBVMS2::SYSTEM 16:33:15 (DCL) CPU=00:00:00.04 PF=307 IO=88 MEM=264 appears when pressing ctrl+t (which is defined to send an ASCII 20 which is legally a “device control 4” command).
To find out more about the current terminal, use the SHOW TERMINAL command.
$ show terminal
Terminal: _FTA3:      Device_Type: VT102         Owner: SYSTEM

   Input:    9600     LFfill:  0      Width: 252      Parity: None
   Output:   9600     CRfill:  0      Page:   84

Terminal Characteristics:
   Interactive        Echo               Type_ahead         No Escape
   Hostsync           TTsync             Lowercase          Tab
   Wrap               Scope              No Remote          No Eightbit
   Broadcast          No Readsync        No Form            Fulldup
   No Modem           No Local_echo      No Autobaud        No Hangup
   No Brdcstmbx       No DMA             No Altypeahd       Set_speed
   No Commsync        Line Editing       Insert editing     No Fallback
   No Dialup          Secure server      No Disconnect      No Pasthru
   No Syspassword     No SIXEL Graphics  No Soft Characters Printer port
   Numeric Keypad     ANSI_CRT           Regis              No Block_mode
   Advanced_video     Edit_mode          DEC_CRT            No DEC_CRT2
   No DEC_CRT3        No DEC_CRT4        No DEC_CRT5        No Ansi_Color
   VMS Style Input    <CTRL-H> Delete
$
Note that these settings are the result of this command run earlier: SET TERMINAL/INQUIRE/INSERT/BACKSPACE=DELETE which configured the terminal automatically plus set it into insert mode and defined the backspace key and a key that deletes characters.
The output also tells us that we are using terminal FTA3: and that the terminal type is VT102 which is a Digital Equipment Corporation Video Terminal created in the 1970s, one of the most common terminal types also used by Unix and most text-based outputs of personal computers (I remember the Atari ST used VT52 which is a close relative).
OpenVMS know the concept of a “current directory” which is called the “default directory” (as in the directory which is targeted by default until changed). To show information about the shell’s process and default directory (and to resolve the directory names to disk locations), use the SHOW command. SHOW DEFAULT will likely give the same answer for the default directory as SHOW PROCESS.
$ show process

13-JUN-2026 16:43:50.58   User: SYSTEM           Process ID:   0000042A
                          Node: VBVMS2           Process name: "SYSTEM"

Terminal:           FTA3:
User Identifier:    [SYSTEM]
Base priority:      4
Default file spec:  SYS$SYSROOT:[SYSEXE]
Number of Kthreads: 1 (System-wide limit: 2)

Devices allocated:  VBVMS2$FTA3:
$ show default
  SYS$SYSROOT:[SYSEXE]
  =   SYS$SYSROOT:[SYSEXE]
  =   SYS$COMMON:[SYSEXE]
$ show logical sys$sysroot
   "SYS$SYSROOT" = "VBVMS2$DKA0:[SYS0.]" (LNM$SYSTEM_TABLE)
        = "SYS$COMMON:"
1  "SYS$COMMON" = "VBVMS2$DKA0:[SYS0.SYSCOMMON.]" (LNM$SYSTEM_TABLE)
$
The SHOW LOGICAL command shows environment variables (called “logical names”) and where they have been defined. Environment variables (logical names) can be defined at process, job (process group), group (user group), system, and cluster level.
Besides logical names there are also “symbols” which are the rough equivalent of PowerShell aliases. To define an alias “cls” that does what “cls” does in cmd.exe, you can state this:
CLS=”TYPE/PAGE NL0:”
TYPE outputs a file, /PAGE is always the qualifier telling a command to output page by page and NL0: is a null device like $null in PowerShell. Note that DCL, like PowerShell, uses the same command-line qualifiers for every command. The effect of /PAGE is always caused by /PAGE.
But the system user really should not be typically used. We must create an account. System programs and scripts are stored in a directory with the logical name SYS$SYSTEM. The root directory of the drive is [000000] (for ancient reasons), and the script for creating user accounts is called ADDUSER.COM and I always forget where it is located. The pseudo-directory […] represents all subdirectories. So to create a new user account, we need to find adduser.com and then assign rights and privileges to the user account. We will create an over-privileged superuser account because we are irresponsible idiots.
$ set default dka0:[000000]
$ directory

Directory DKA0:[000000]

000000.DIR;1        ALPHA_TOOLS.DIR;1   BACKUP.SYS;1        BADBLK.SYS;1
BADLOG.SYS;1        BITMAP.SYS;1        CONTIN.SYS;1        CORIMG.SYS;1
GPT.SYS;1           INDEXF.SYS;1        SECURITY.SYS;1      SYS0.DIR;1
TCPIP$DHCP.DIR;1    VMS$COMMON.DIR;1    VOLSET.SYS;1

Total of 15 files.
$ directory [...]adduser.com

Directory DKA0:[SYS0.SYSCOMMON.SYSHLP.EXAMPLES]

ADDUSER.COM;1

Total of 1 file.

Directory DKA0:[VMS$COMMON.SYSHLP.EXAMPLES]

ADDUSER.COM;1

Total of 1 file.

Grand total of 2 directories, 2 files.
$ set default DKA0:[VMS$COMMON.SYSHLP.EXAMPLES]
$ directory *.com

Directory DKA0:[VMS$COMMON.SYSHLP.EXAMPLES]

ACMEUTIL.COM;1      ACMEUTIL_SETUP.COM;1                    ACME_EXAMPLE_DOI_BUILD.COM;1
ACME_PERSONA_BUILD.COM;1                ADDUSER.COM;1       BACKUSER.COM;1
CALC_SYSDISK_FREESPACE.COM;1            CLU_MOUNT_DISK.COM;1
CREATE_INFOSERVER_SERVICE.COM;1         DAYLIGHT_SAVINGS.COM;1
DECDTM$EXAMPLE1.COM;1                   DECDTM$EXAMPLE2.COM;1
ENHANCED_ERAPAT.COM;1                   EXAMPLE_F$GETDVI_2TB_DISK.COM;1
LAN$POPULATE.COM;1  LAT$RATING_BUILD.COM;1                  LAVC$BUILD.COM;1
LIB$TABLE_PARSE_DEMO.COM;1              LRDRIVER.COM;1      MGRMENU.COM;1
MONITOR.COM;1       MONSUM.COM;1        MSCPMOUNT.COM;1     MYTEST_LNK.COM;1
OLD_DAYLIGHT_SAVINGS.COM;1              OSIT$CMD_EXECUTOR.COM;1
PARTITIONS.COM;1    RAD.COM;1           RDB$SDA.COM;1       RESET_DEVICE_PROTECTION.COM;1
RESTUSER.COM;1      RMSJNL_EXAMPLE.COM;1                    SETUP_NCL_KEYPAD.COM;1
SPL.COM;1           SUBMON.COM;1        SYS$NET_SERVICES_EXAMPLE.COM;1
UWSS_LNK.COM;1      VMS$PASSWORD_POLICY_LNK.COM;1           WORKING_SET.COM;1
XTI_EXAMPLES.COM;1

Total of 40 files.
Run the script (called a “procedure” in OpenVMS):
$ @adduser
***************************************************************************
*  Creating a NEW user account... If at ANY TIME you need help about a    *
*  prompt, just type "?".                                                 *
***************************************************************************


Username(s) - separate by commas: benoit

 *** Processing BENOIT's account ***

Full name for BENOIT: Benoit Brisefer
Password (password is not echoed to terminal) [BENOIT]:

UIC Group number [200]:
UIC Member number: 1
Account name: benoit
Privileges [TMPMBX,NETMBX]:

Login directory [BENOIT]:
Login device [SYS$SYSDEVICE:]:

%CREATE-I-CREATED, SYS$SYSDEVICE:[BENOIT] created
%UAF-I-ADDMSG, user record successfully added
%UAF-I-RDBADDMSGU, identifier BENOIT value [000200,000001] added to rights database
%UAF-I-DONEMSG, system authorization file modified
%UAF-I-RDBDONEMSG, rights database modified

Check newly created account:


Username: BENOIT                           Owner:  BENOIT BRISEFER
Account:  BENOIT                           UIC:    [200,1] ([BENOIT])
CLI:      DCL                              Tables: DCLTABLES
Default:  SYS$SYSDEVICE:[BENOIT]
LGICMD:
Flags:
Primary days:   Mon Tue Wed Thu Fri
Secondary days:                     Sat Sun
No access restrictions
Expiration:            (none)    Pwdminimum: 15   Login Fails:     0
Pwdlifetime:         60 00:00    Pwdchange:      (pre-expired)
Last Login:            (none) (interactive),            (none) (non-interactive)
Maxjobs:         0  Fillm:       128  Bytlm:        128000
Maxacctjobs:     0  Shrfillm:      0  Pbytlm:            0
Maxdetach:       0  BIOlm:       150  JTquota:        4096
Prclm:           8  DIOlm:       150  WSdef:          4096
Prio:            4  ASTlm:       300  WSquo:          8192
Queprio:         4  TQElm:       100  WSextent:      16384
CPU:        (none)  Enqlm:      4000  Pgflquo:      256000
Authorized Privileges:
  NETMBX       TMPMBX
Default Privileges:
  NETMBX       TMPMBX
%UAF-I-NOMODS, no modifications made to system authorization file
%UAF-I-RDBNOMODS, no modifications made to rights database

Is everything satisfactory with the account [YES]:
And then finally, change to the system directory and configure the new user account. Note that DCL and programs using DCL provide online help with the HELP command.
This configures user benoit (MODIFY benoit) not to have an expired password (/NOPWDEXPIRED), not to have a password lifetime (/NOPWDLIFETIME), and to have system privilege (/PRIVILEGES=SYSPRV). None of these are settings you should typically apply to a user account.
But in this case it a) makes it possible for the user to log on using ssh without having to set a new password, b) does not require the user to change the password regularly, and c) allows the user to act with system privilege. The latter is not a good thing and is akin (but not as devastatingly bad and inconvenient) as the Administrators group in Windows.
Logging on using the new user and trying a few commands…
 Welcome to OpenVMS (TM) x86_64 Operating System, Version V9.2-3
benoit@vbvms2's password:

    Last interactive login on Wednesday, 17-NOV-1858 00:00:00.00
    Last non-interactive login on Wednesday, 17-NOV-1858 00:00:00.00
$ show default
  SYS$SYSDEVICE:[BENOIT]
$ directory
%DIRECT-W-NOFILES, no files found
$ create myfile.txt
I am a file.
 Exit
$
$ directory

Directory SYS$SYSDEVICE:[BENOIT]

MYFILE.TXT;1

Total of 1 file.
$ type myfile.txt
I am a file.
$ delete myfile.txt
%DELETE-E-DELVER, explicit version number or wild card required
$ delete myfile.txt;*
$
The “Exit” command after CREATE myfile.txt was caused by pressing ctrl+z (ASCII 26 “Substitute”).
The reason for %DELETE-E-DELVER, explicit version number or wild card required was that OpenVMS refuses to delete a file unless its version number is given (or “*” for all versions). On OpenVMS files are versioned, every change creates a new version of the file. A complete file path contains a device, a directory (and possibly subdirectories), a file name, a file type (file name extension), and a version number.
DKA0:[BENOIT]MYFILE.TXT;1
is version 1 of file “MYFILE” of the type “TXT” in te directory BENOIT on device DKA0:.
To wreck havoc with the system privilege it’s best to go to an important directory and start deleting files.
$ set default sys$system
$ create havoc
%CREATE-E-OPENOUT, error opening SYS$SYSROOT:[SYSEXE]HAVOC.; as output
-RMS-E-PRV, insufficient privilege or file protection violation
$ show process

13-JUN-2026 17:42:24.06   User: BENOIT           Process ID:   0000042C
                          Node: VBVMS2           Process name: "BENOIT"

Terminal:           FTA4:
User Identifier:    [BENOIT]
Base priority:      4
Default file spec:  SYS$SYSROOT:[SYSEXE]
Number of Kthreads: 1 (System-wide limit: 2)

Devices allocated:  VBVMS2$FTA4:
$ set process/privileges=sysprv
$ create havoc
Leeeeroy Jenkins!
 Exit
$ directory havoc*

Directory SYS$SYSROOT:[SYSEXE]

HAVOC.;1

Total of 1 file.
$ set process/privileges=nosysprv
$ delete havoc;*
%DELETE-W-FILNOTDEL, error deleting SYS$SYSROOT:[SYSEXE]HAVOC.;1
-RMS-E-PRV, insufficient privilege or file protection violation
$ set process/privileges=sysprv
$ delete havoc;*
$ directory havoc*
%DIRECT-W-NOFILES, no files found
$
Whenever you have abused privileges and deleted files in a system folder you should log off:
$ logoff
Connection to vbvms2 closed.
Next: TBD
]]>OpenVMS 9.2-3 System Installation2026-06-08T01:00:00+02:002026-06-08T01:00:00+02:00http://localhost:4000/OpenVMSBlog/OpenVMSInstallationNote that absolutely none of this is authoritative or directly based on relevant documentation. It’s mostly what I found and figured out and guessed and (in some cases) made up. Some of it may be wrong or dangerous or lead to disaster or confusion. I am not taking responsibility here for anything, not even spelling or good taste. Read and act on it at your own peril!
OpenVMS, usually just called VMS, which stands for “Virtual Memory System” (because it was one of the first such), is an operasting system from the DEC family of operating systems. It shares this honour with Windows NT (which was created by the same team but 15 years later) and Amiga OS (which was based on an operating system originally written for the DEC PDP-11). It is very different from Unix and Linux but shows (obviously) some similarities to Windows NT (and Amiga OS, presumably).
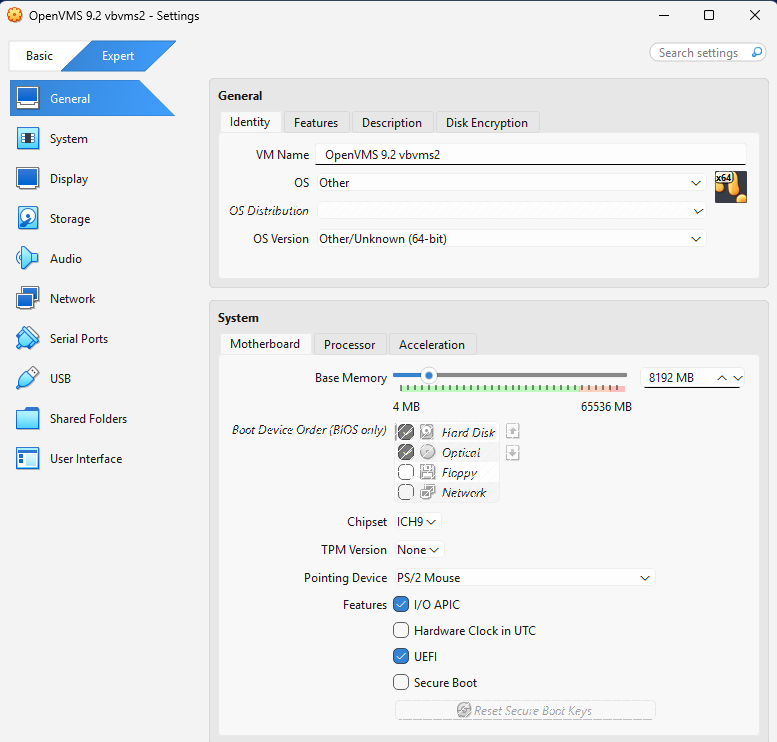
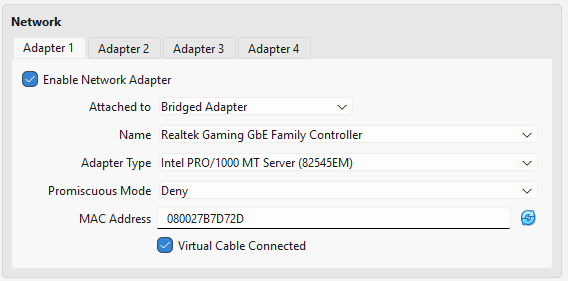
To create a OpenVMS VM in VirtualBox, copy these settings:
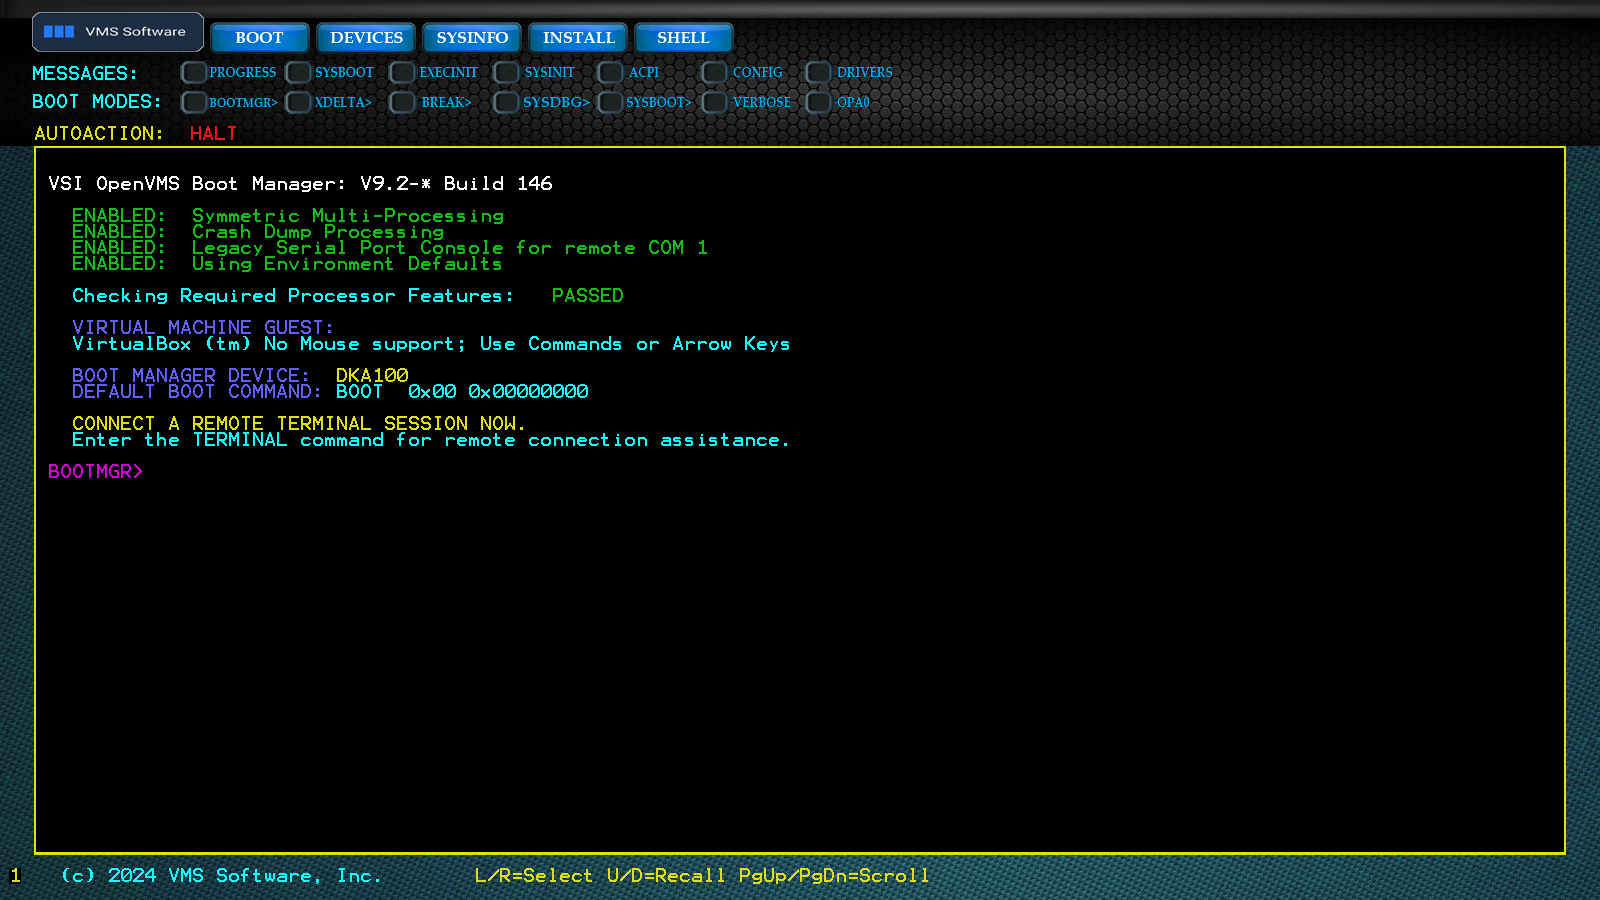
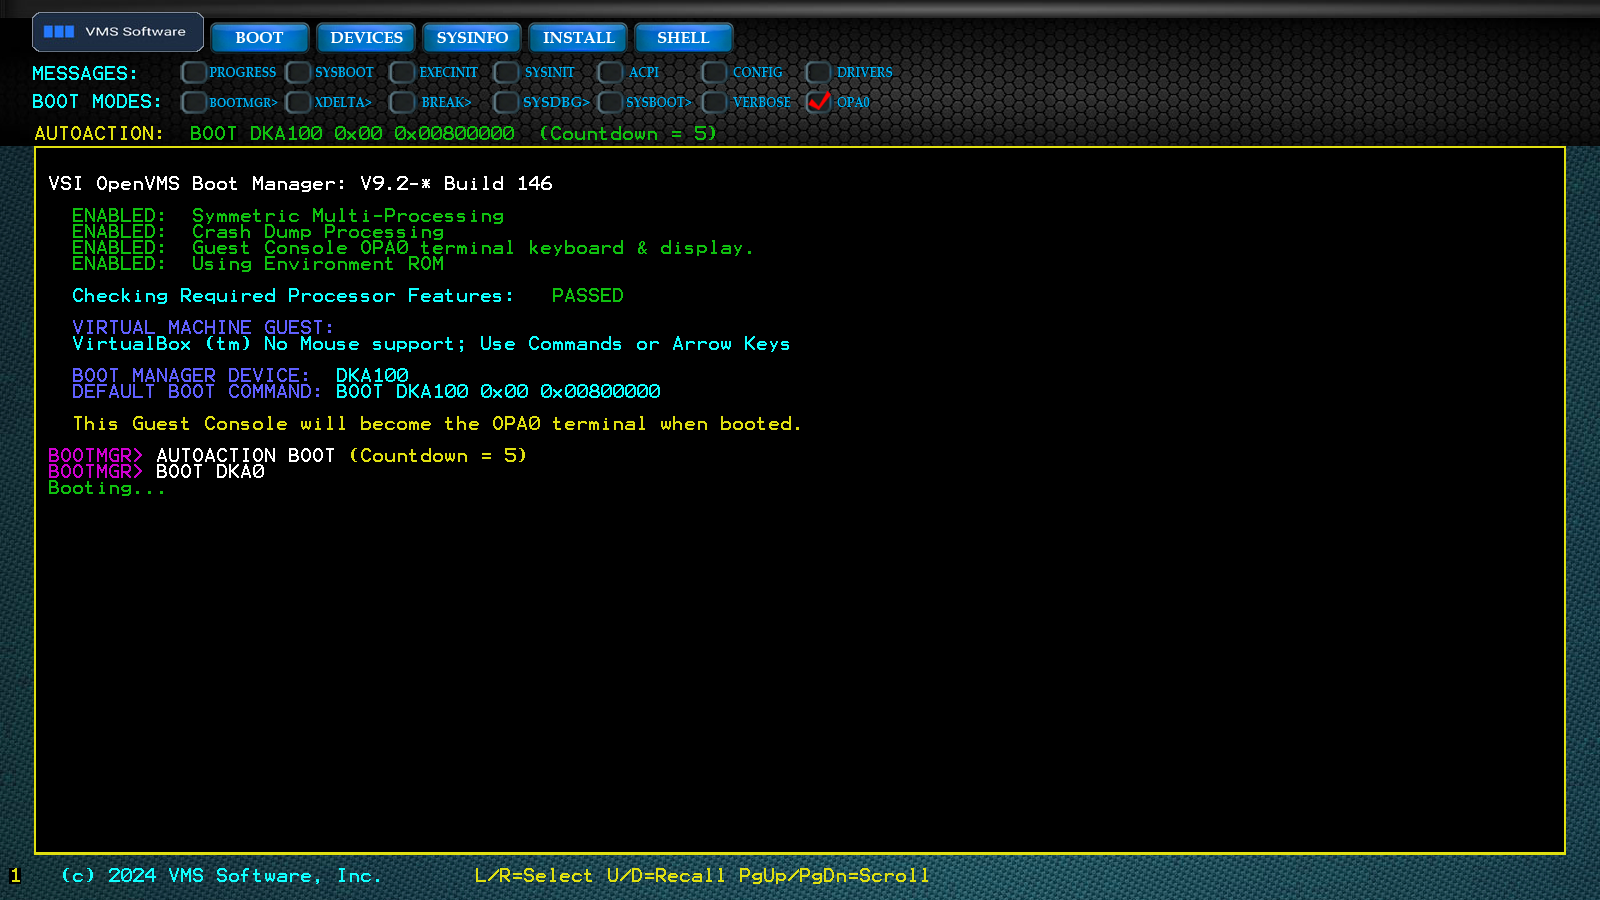
And the result can be a working OpenVMS Boot Manager:
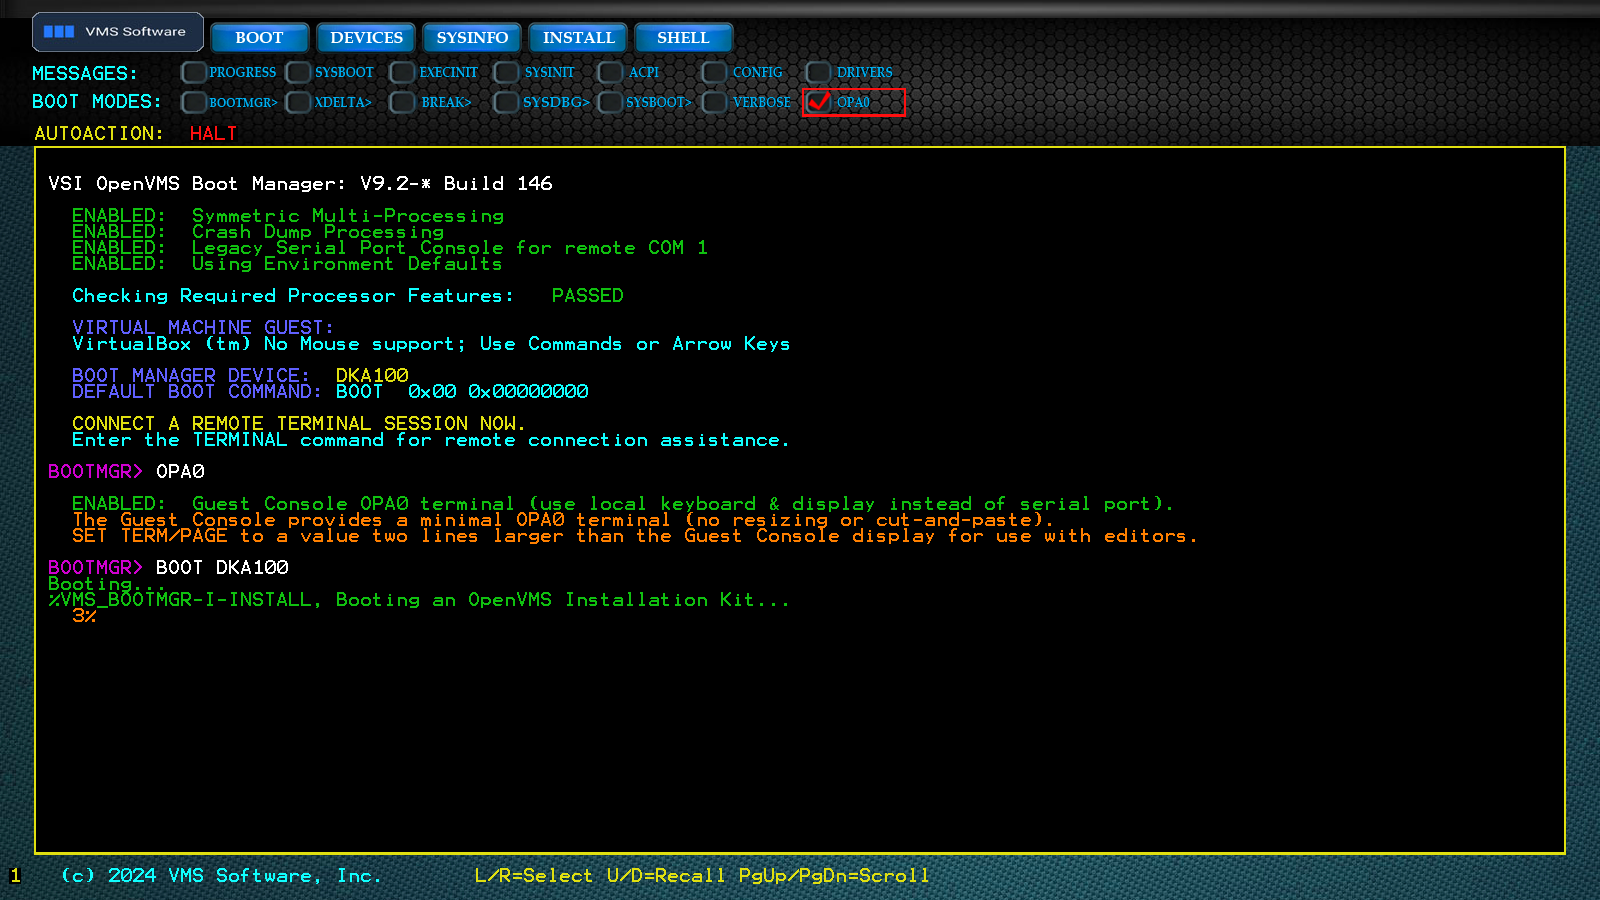
By default OpenVMS uses serial console rather than video screens, but using the OPA0 command, output can be redirected to the console. Then we boot the installer ISO (device name of DKA100).
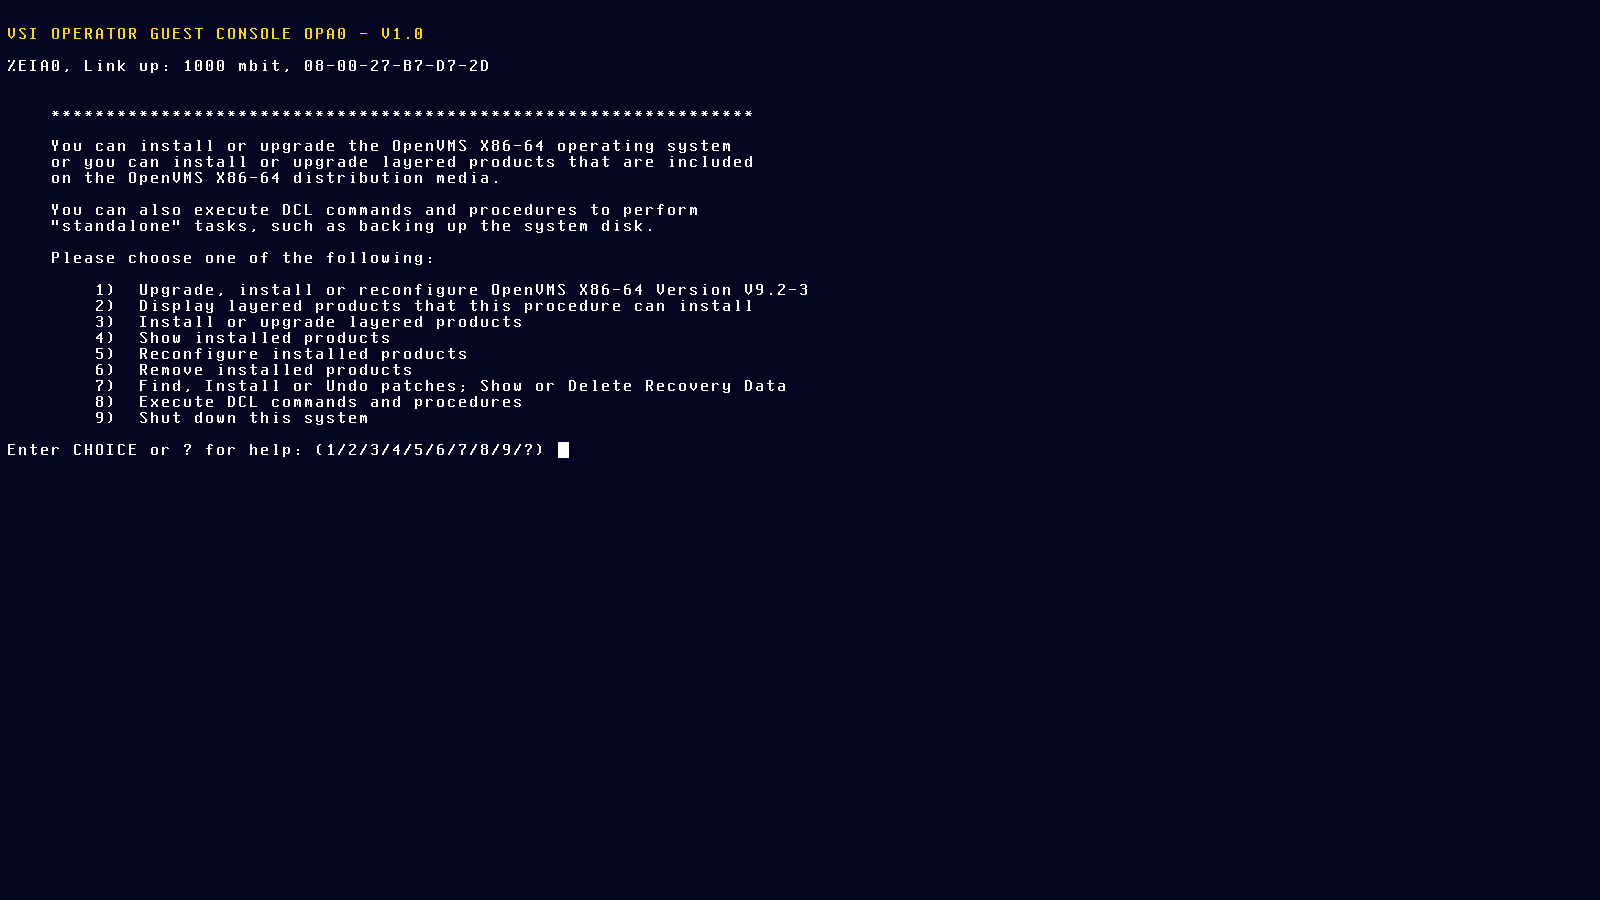
This boots into the installer:
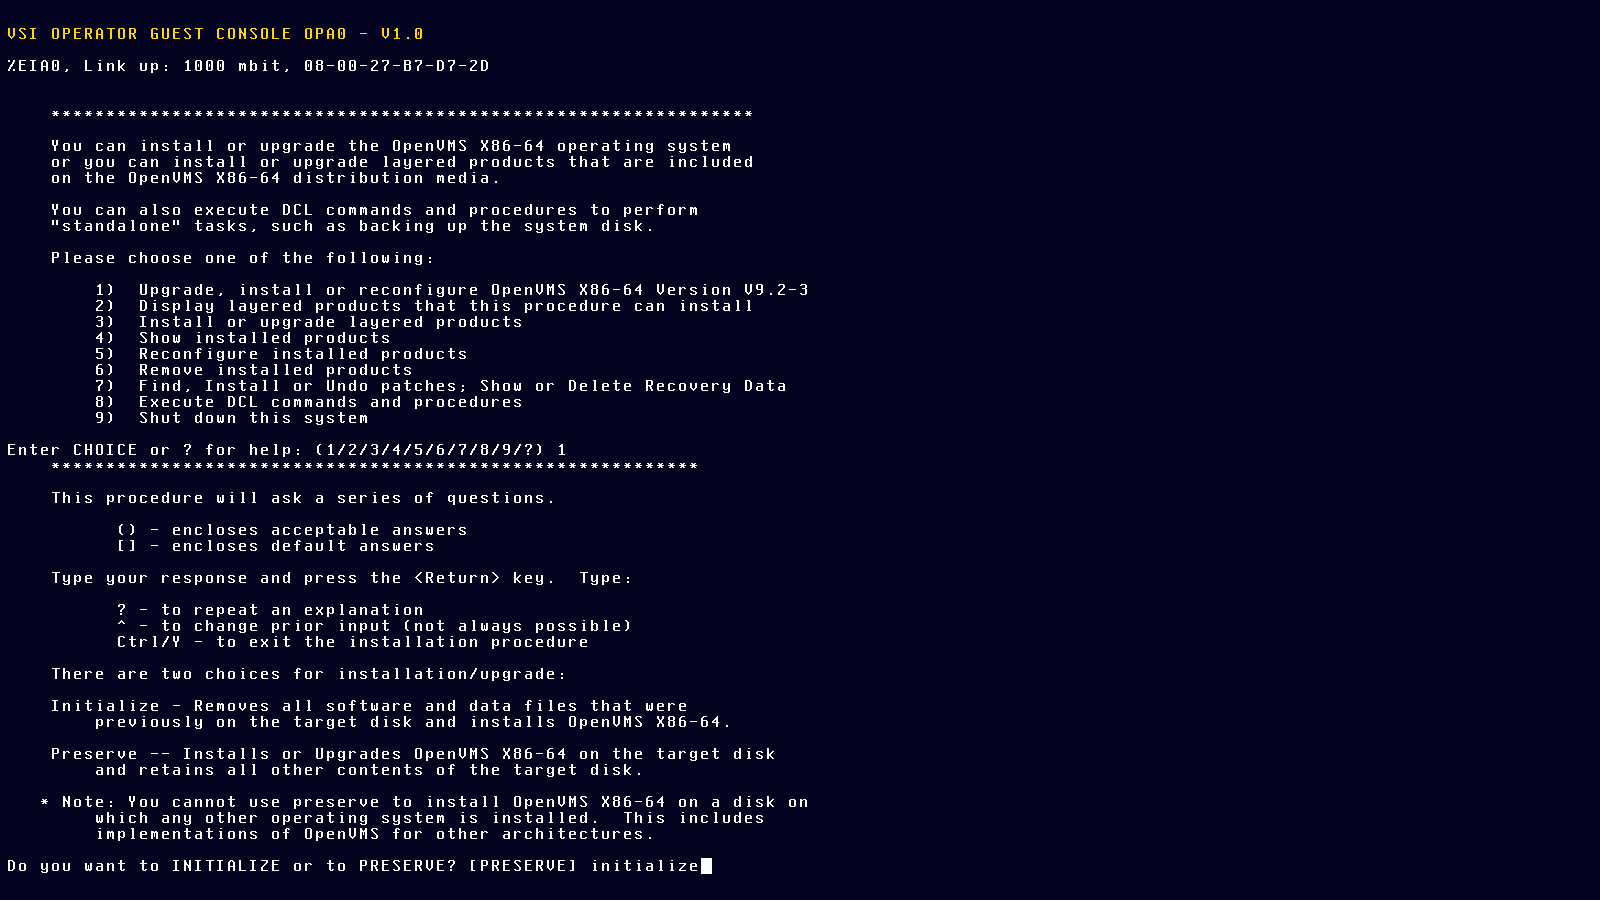
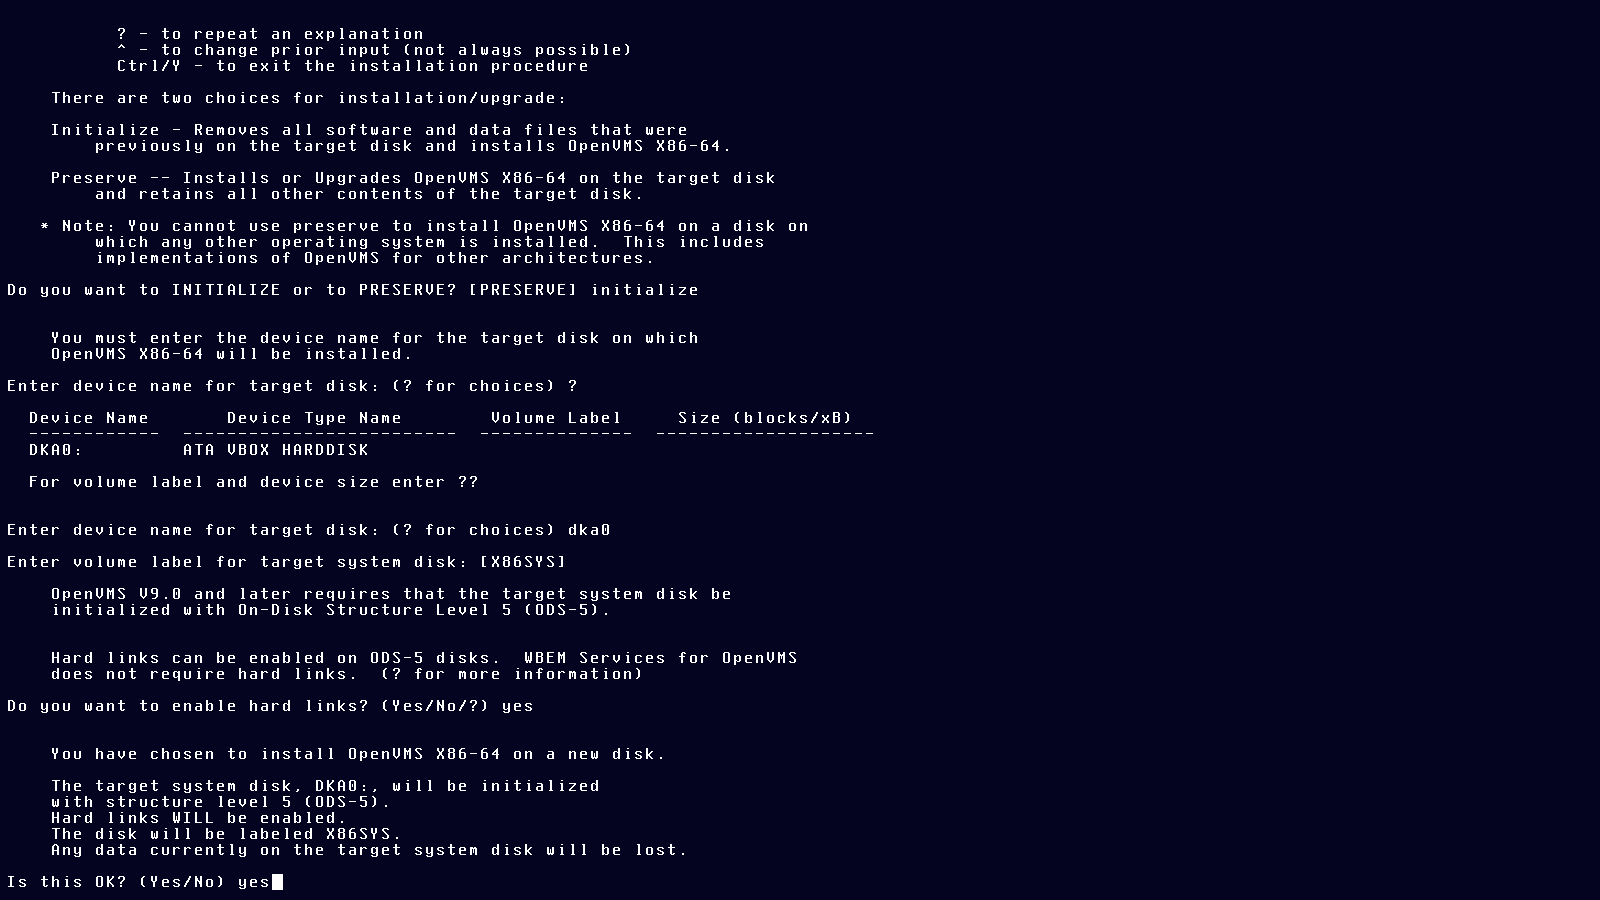
Usually the default answers are good, just make sure to initialize the new disk:
OpenVMS device names are similar to Windows drive letters, except they are device names and not drive letters. DKA devices are some kind of storage drive. DKA0 is the first such. DKA100 is the optical drive,for some reason. We have seen OPA0 as a video screen/console earlier.
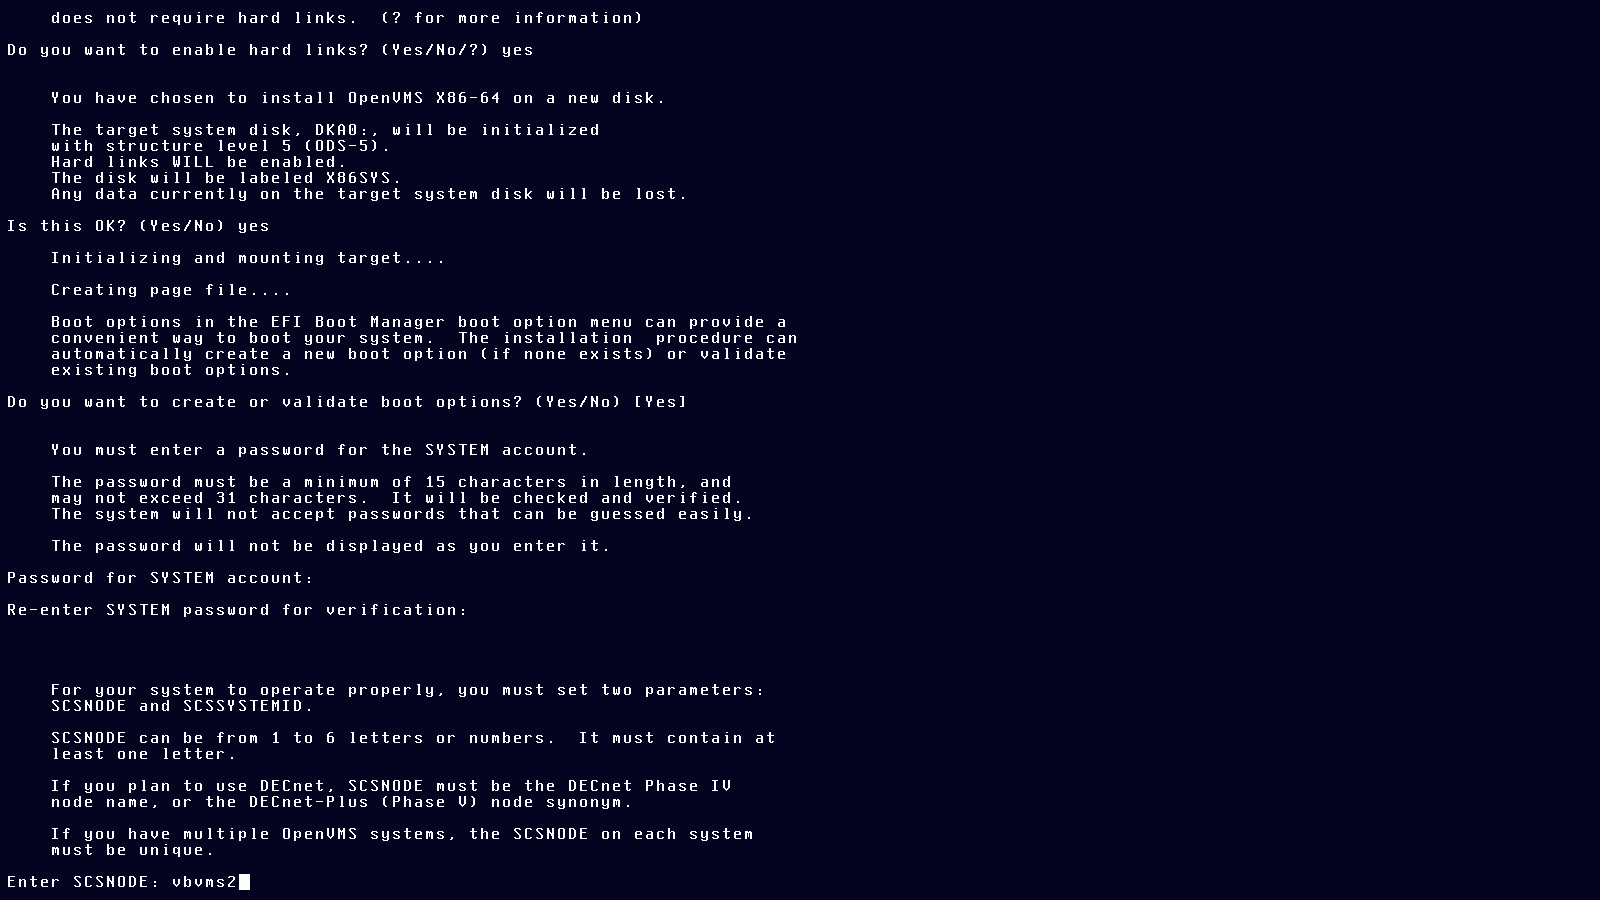
Choose a reasonable, easy-to-remember at least 15 characters password for your SYSTEM account, like Lg9f80A5fVgDoX2. The SYSTEM account is the equivalent of a Unix ROOT account. (Windows NT similarly has a SYSTEM account.) Name the node whatever you want.
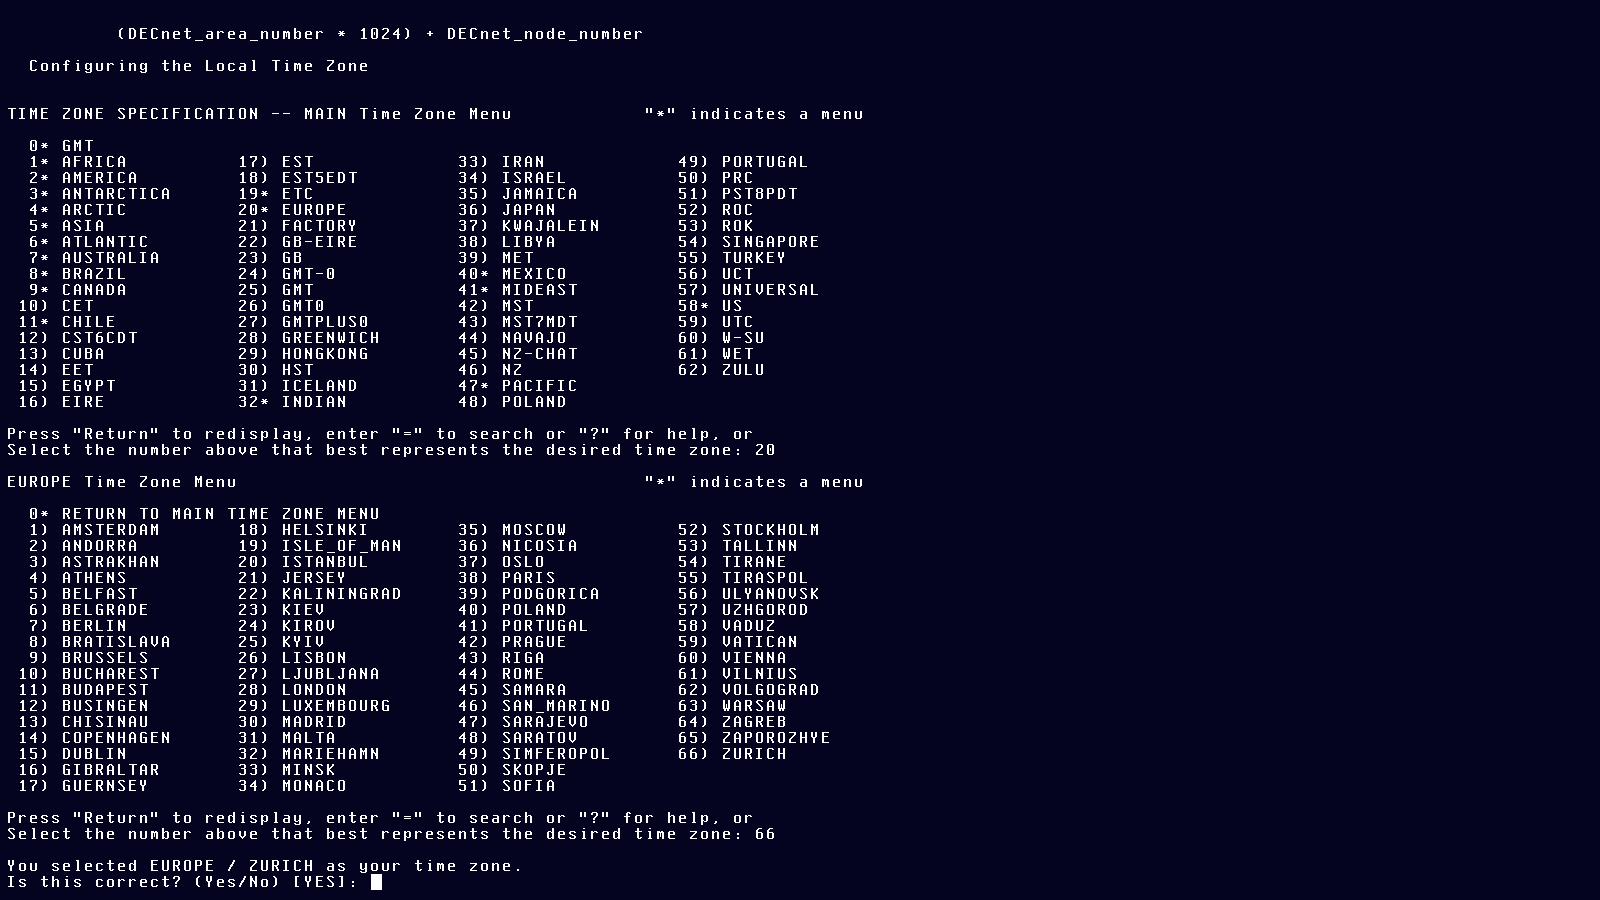
Select a timezone:
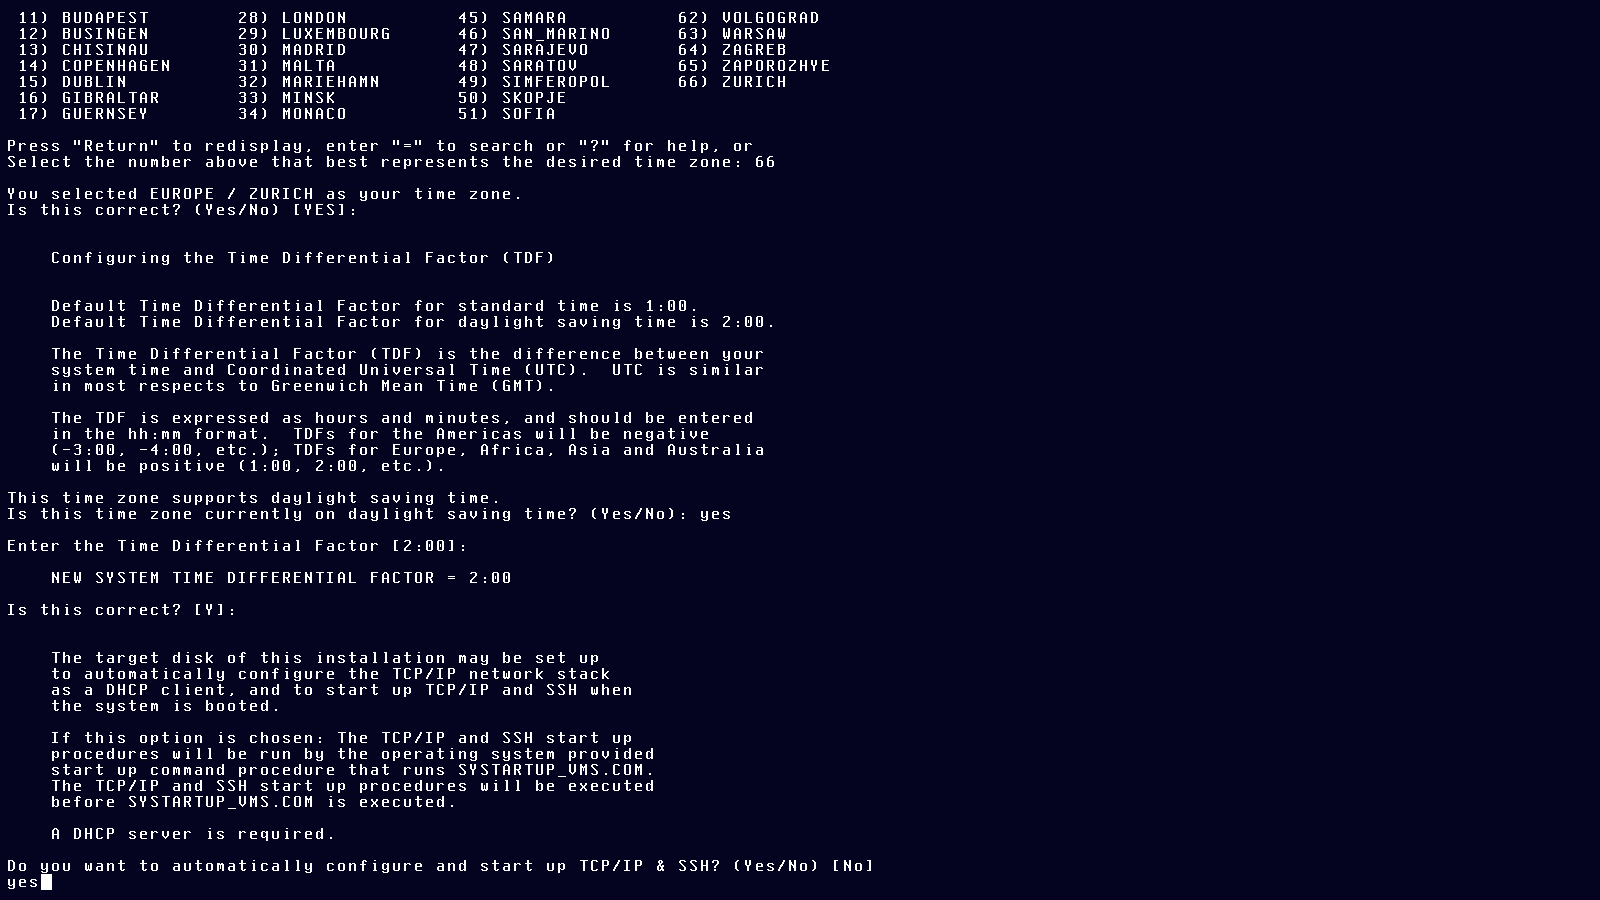
Default settings are good for most of the rest:
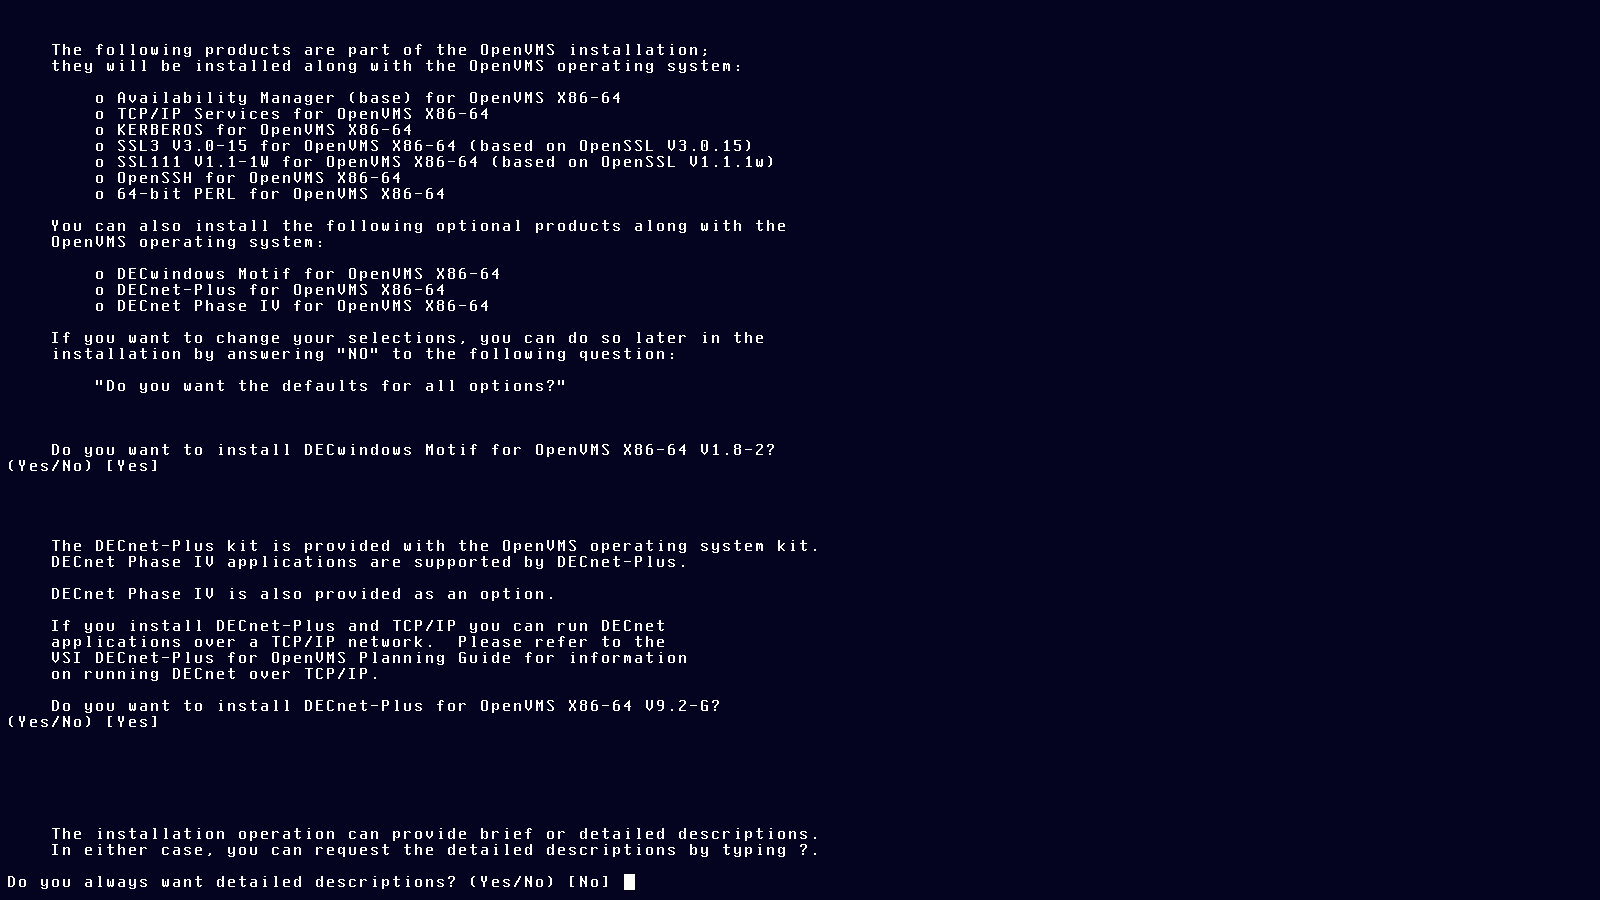
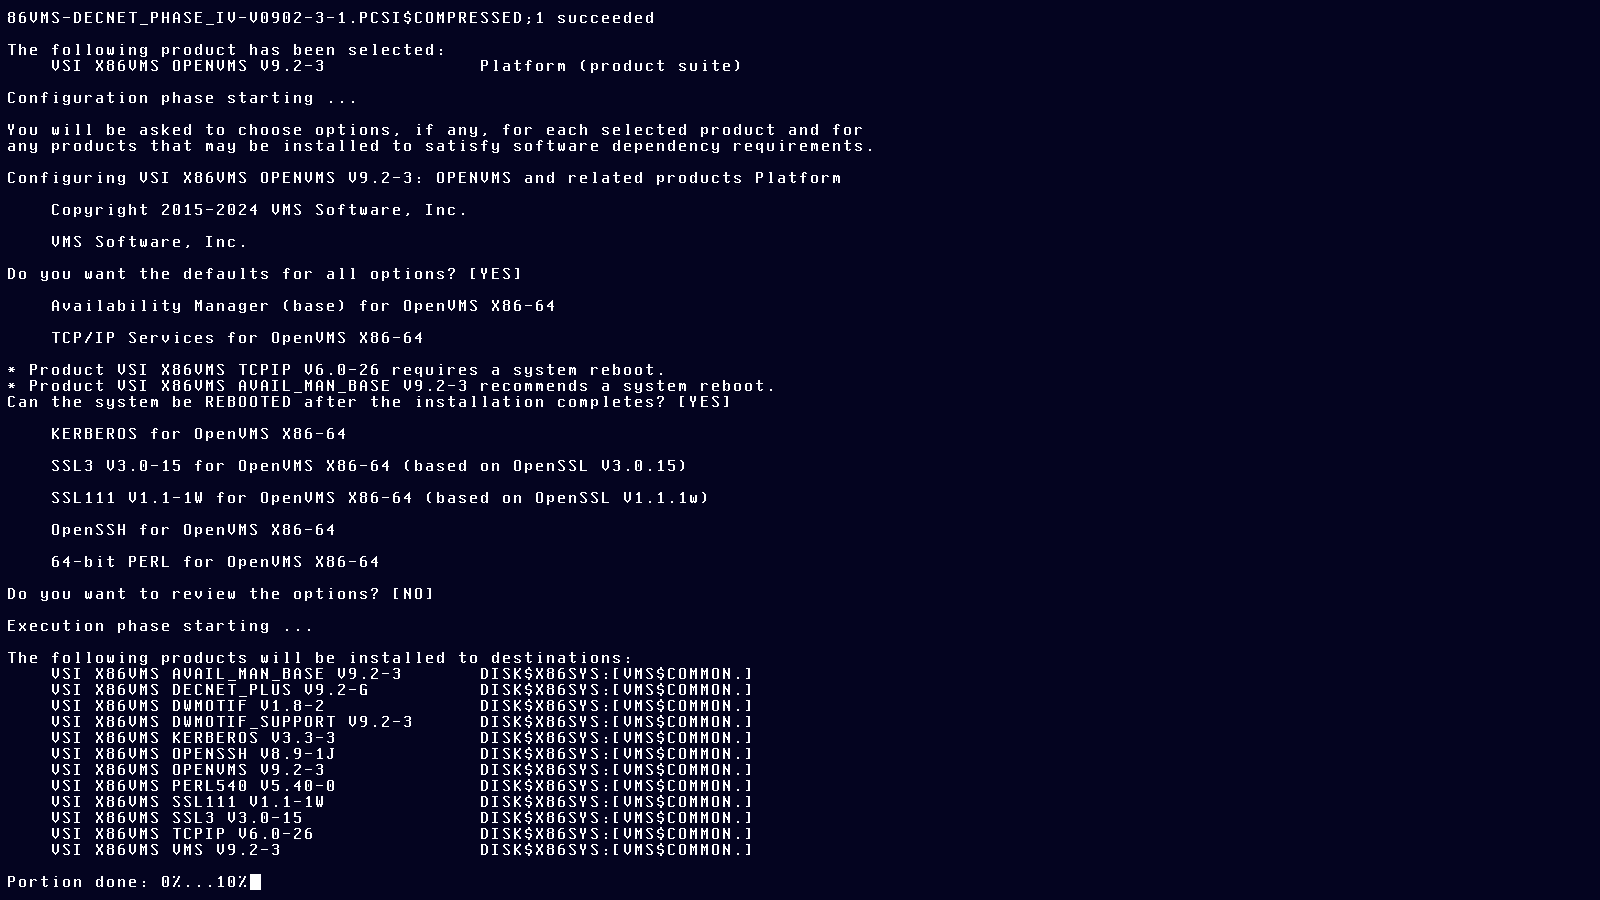
Then wait for the installation to proceed:
Again, default settings:
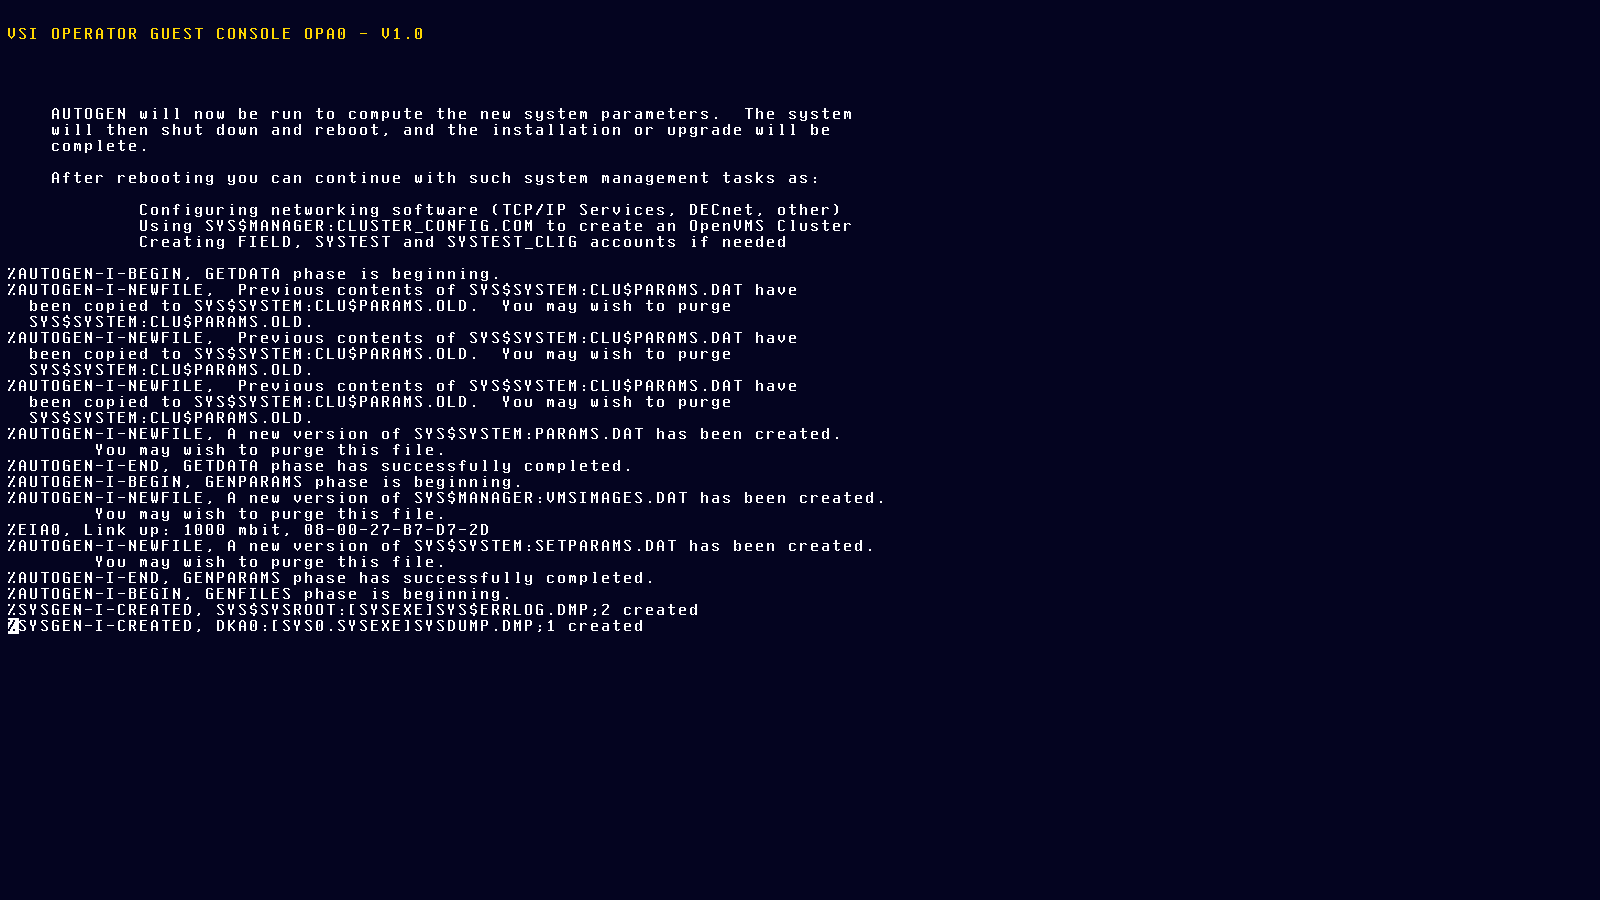
And prepare for reboot.
Reboot:
And finally, configure the boot manager to autostart the installed system:
Once rebooted, configure TCP/IP by running the procedure (batch file, script) tcpip$config.com.
$ @tcpip$config
Batch files are invoked with “@” and the path to the file (with or without the suffix .com). This batch file is located in the SYSTEM user’s login directory.
It is somewhat self-explanatory:
        VSI TCP/IP Services for OpenVMS Configuration Menu

        Configuration options:

                 1  -  Core environment
                 2  -  Client components
                 3  -  Server components
                 4  -  Optional components

                 5  -  Shutdown VSI TCP/IP Services for OpenVMS
                 6  -  Startup VSI TCP/IP Services for OpenVMS
                 7  -  Run tests

                 A  -  Configure options 1 - 4
                [E] -  Exit configuration procedure

Enter configuration option:
After another reboot TCP/IP and ssh should be working:
PS C:\> ssh vbvms2 -lsystem

 Welcome to OpenVMS (TM) x86_64 Operating System, Version V9.2-3
system@vbvms2's password:

$
First thing you want to do is configure the terminal and make that configuration stay:
$ set terminal/inquire
$ edit sylogin.com
In the editor, find this place and add these commands.
They will configure your terminal the way I like it and make ssh commands available.
Press F10 or ctrl+z to save the file.
$!    =======  =================  ===========
$!     A D D    C O M M A N D S    B E L O W
$!    =======  =================  ===========
$
$ set terminal/inquire/insert/backspace=delete
$ @SSH$ROOT:[BIN]SSH$DEFINE_COMMANDS.COM
$
$!    =======  =================  ===========
$!     A D D    C O M M A N D S    A B O V E
$!    =======  =================  ===========
Create the ssh directory for the user’s ssh configuration. This is not .ssh as in Unix and Windows but ssh. (The “.” in OpenVMS is the path separator, like “/” in Unix and “\” in Windows.)
Press ctrl+z to save the text typed during file creation.
$ create/directory [.ssh]
$ set default [.ssh]
$ create authorized_keys
paste public keys here
 Exit
$ type authorized_keys.
paste public keys here
$
]]>Blog General Info2026-05-15T01:00:00+02:002026-05-15T01:00:00+02:00http://localhost:4000/OpenVMSBlog/OpenVMSBlogGeneralInfoThis is the first post to my new OpenVMS blog.
The blog will be mainly about the OpenVMS operating system.