Note that this tutorial is now hopelessly out of date. It refers to an
out-dated version of Xcode and Interface Builder and Cocoa# is being
phased out by Novell.
Read the blog post about the official replacement for Cocoa#:
http://tirania.org/blog/archive/2010/Apr-19.html
I personally recommend Monobjc:
http://www.monobjc.net/
It might still be useful to read the tutorial as Monobjc works
quite similar to Cocoa#. But generally the times of Cocoa# are over.
Stupid
Word Counter
A simple Cocoa# tutorial
Prerequisites:
- You need a Windows machine or virtual machine with Microsoft
Visual Studio installed.
- Microsoft C# Express might suffice.
- You also need a Mac OS X machine with Xcode installed.
- This tutorial assumes Visual Studio 2005 on Windows Vista and
Xcode 3 on Leopard.
- Mono must be installed on the Mac OS X machine. I use Mono 1.2.6.
xerxes:~ ajbrehm$ mono --version
Mono JIT compiler version 1.2.6 (tarball)
Copyright (C) 2002-2007 Novell, Inc and Contributors.
www.mono-project.com
TLS: normal
GC:
Included Boehm (with typed GC)
SIGSEGV: normal
Notification: Thread + polling
Architecture: x86
Disabled: none
The purpose of this tutorial is to demonstrate how to create a .NET
application written in C# in Visual Studio and then port it to Cocoa
using Cocoa#. Technically, this means creating a Windows Forms
application and then rewrite it to use Cocoa# instead. .NET Windows
Forms and Cocoa# are both bindings to the respective system's native
GUI toolkit (Win32 and Cocoa respectively).
C# supports #define statements and hence the same source file can
contain both Win32 and Cocoa calls. The resulting two binaries are both
.NET programs and .EXE files, but one of them will only run on Mac OS X.
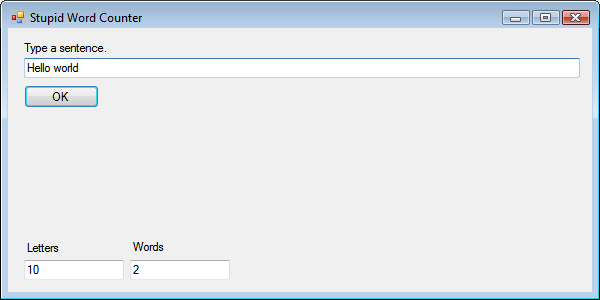
The program "StupidWordCounter.exe" will count the letters and words in
a string in a text box and output those numbers in two other text boxes.
Here's what it will look like:
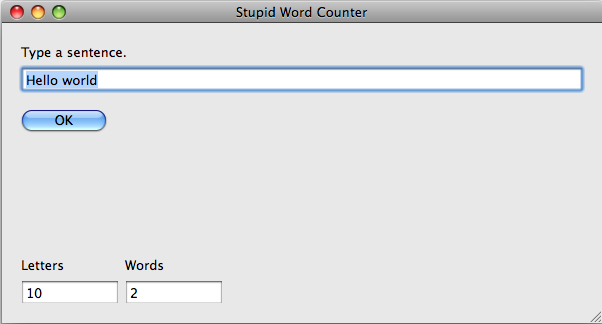
And the Mac OS version will look like this:
Step 1: Create a project in Visual Studio
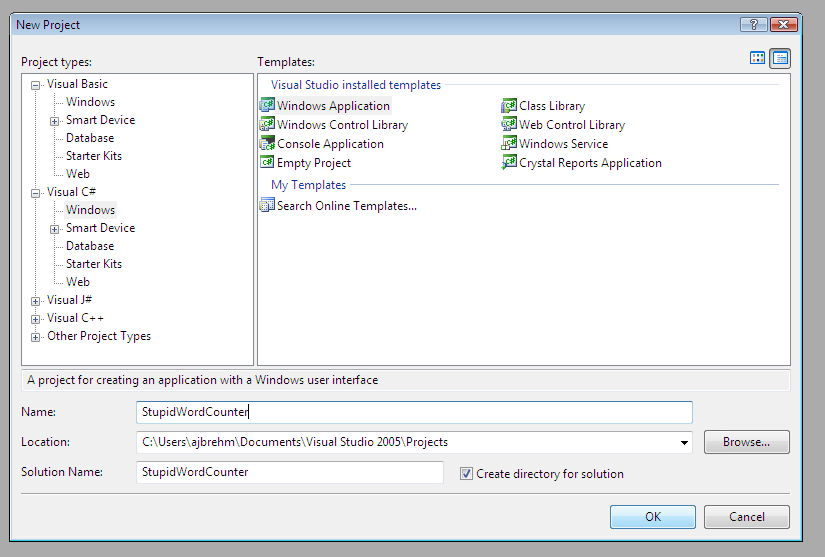
Create a project in Visual Studio for a Visual C# "Windows Application"
and name it "StupidWordCounter".
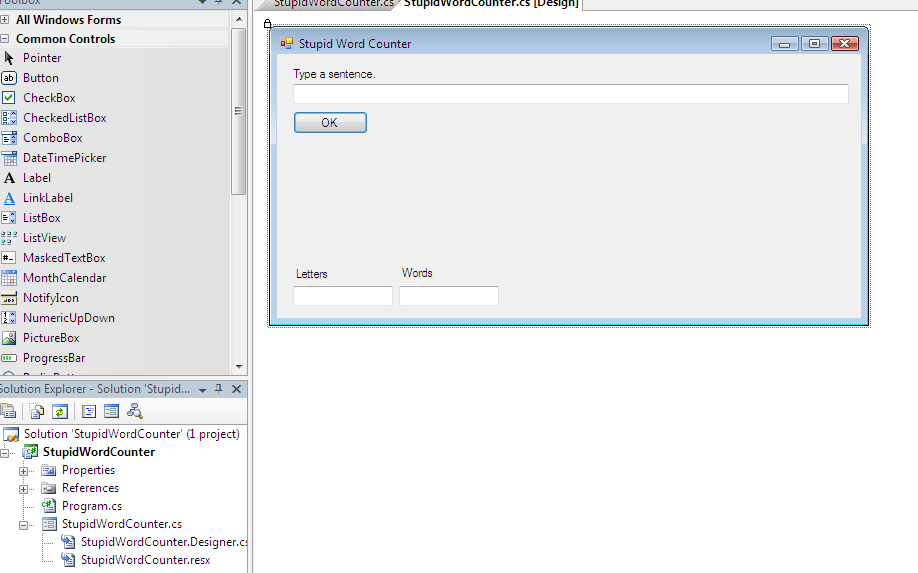
Name the form "Stupid Word Counter" and create labels, text boxes, and
the OK button as shown above. Make the window 600x300 in size and also
set a minimum and maximum size of 600x300.
Note that Visual Studio has created the following C# source files for
you:
- Program.cs
- StupidWordCounter.cs
Create another source file named
- StupidWordCounterModel.cs
Program.cs is the main entry point for the program.
StupidWordCounter.cs is the class that interacts with the window and
acts as the delegate for the window (i.e. reacts to events that happen
to the window). StupidWordCounterModel.cs will contain the mechanism
for counting the words and letters in the input text box.
Program.cs and StupidWordCounter.cs will contain code specific to
Windows Forms (Win32) or Cocoa# (Mac OS), StupidWordCounterModel.cs
will be the same for both platforms.
Find the contents for the source files here:
Compile and run the project to check whether it works fine so far. You
should see the program shown in the first screenshot:
Now modify Program.cs and StupidWordCounter.cs to include code that
applies only to Cocoa#. This code won't be compiled in Visual Studio
and will be shown in grey.
Compile and run the project again to confirm that everything still
works.
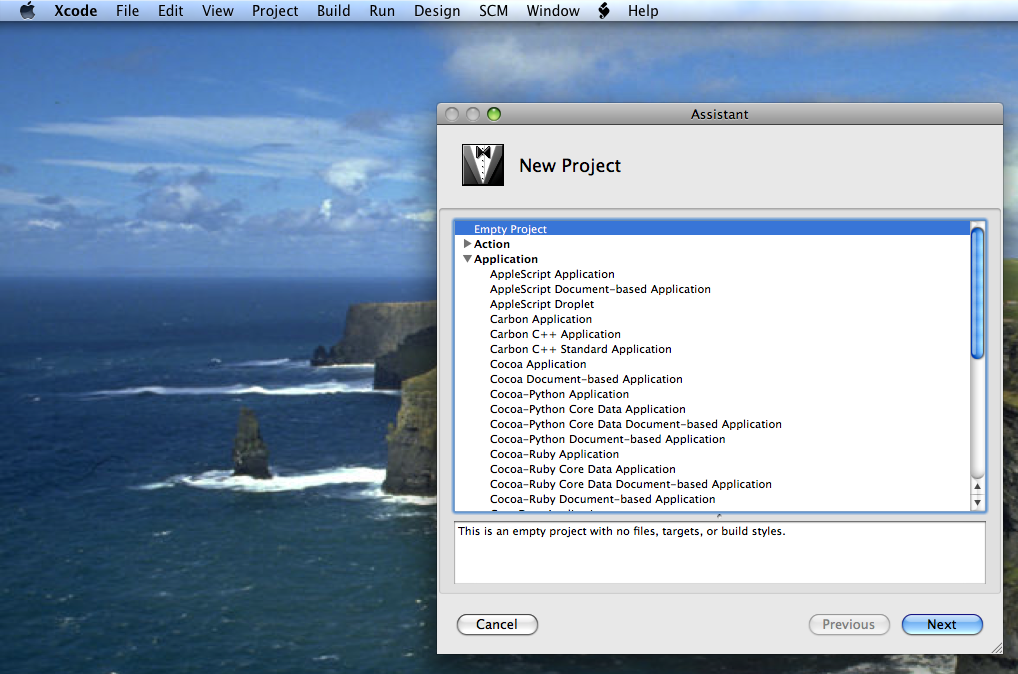
Step 2: Create a Xcode project
Copy the entire Visual Studio project for the program to your Mac and
create an Xcode project in the same directory.
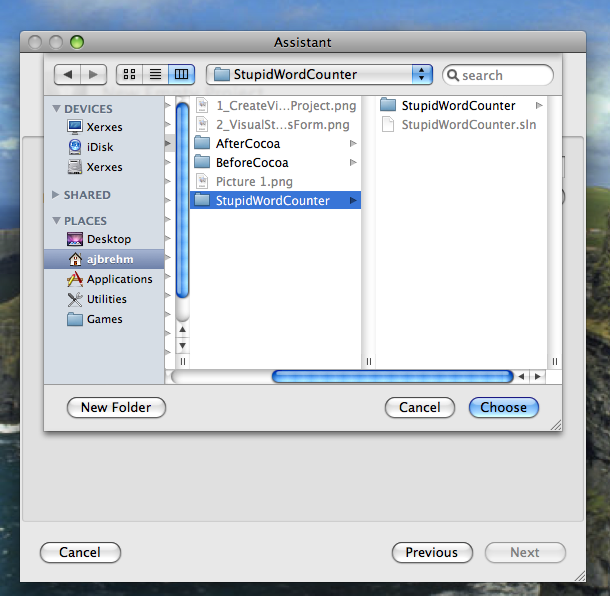
Note that Visual Studio 2005 projects contain a subdirectory with the
same name as the project. The Xcode project will have to be in that
same subdirectory. This is shown here:
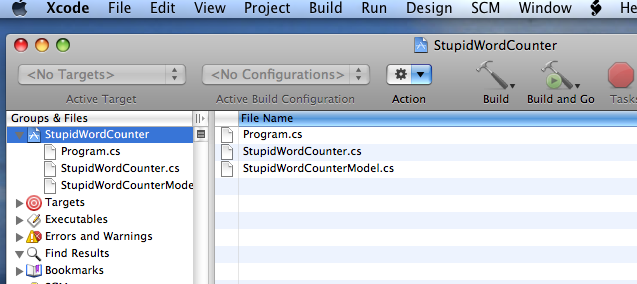
Add the source files to the project (and tell Xcode to copy them if
necessary).
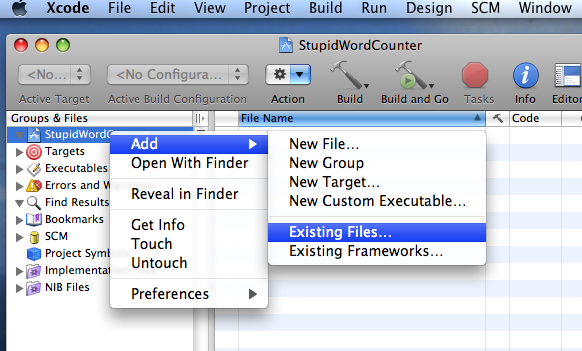
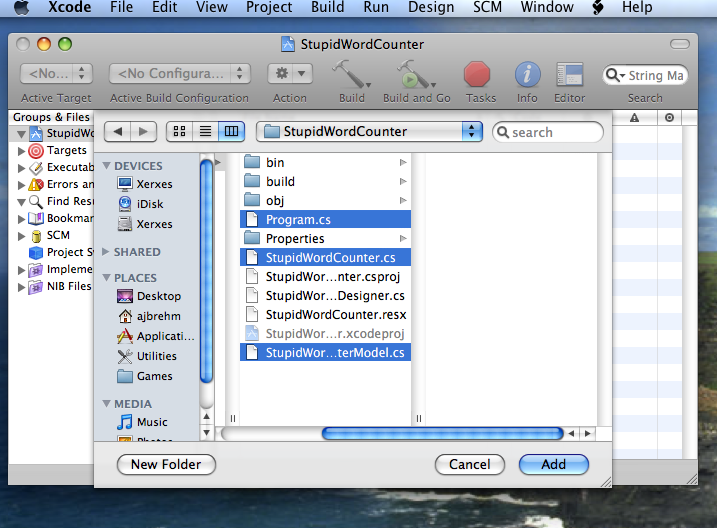
We need the three files mentioned above (Program.cs,
StupidWordCounter.cs, and StupidWordCounterModel.cs). We do not need
StupidWordCounter.Designer.cs, as that is basically the Windows Forms
GUI we are replacing.
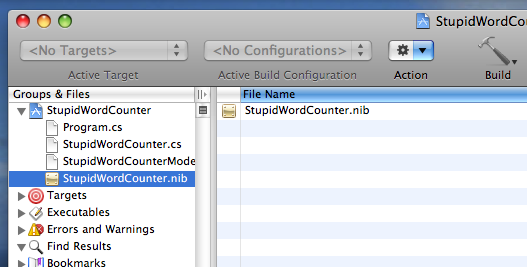
It should look like this now:
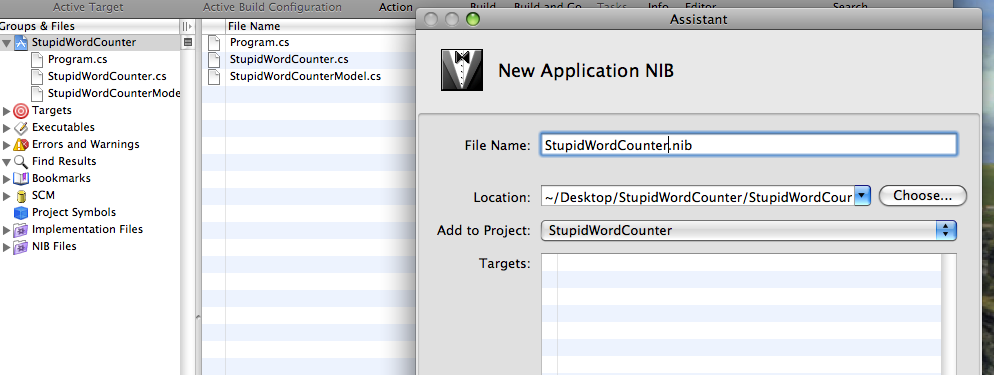
Also add a NIB file:
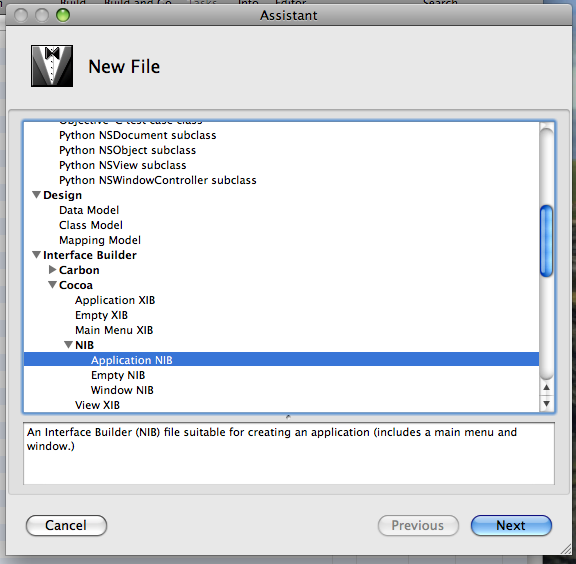
Name it "StupidWordCounter.nib" and make sure it really is a NIB (and
not a XIB) file.
Also add a new text file and name it "Makefile".
(You can find a Makefile to
use here.)

Note that the Makefile calls Mono's C# compiler with the
"-define:COCOA" parameter. Doing so makes the compiler compile the
Cocoa# code but not the Windows Forms code as defined in Visual Studio
earlier.
Also note that the Makefile will compile all relevant sources, then
remove an existing application bundle, and then create a new
application bundle for the .exe file. It does this because the Finder
will not start .exe files. All Cocoa programs and most Carbon programs
are really directories called bundles that contain the actual binary
and support files. Cocoa# programs are no different from other
Macintosh programs in that regard.
Step 3: Create a new Cocoa GUI for the
program
Doubleclick StupidWordCounter.nib to start Interface Builder.
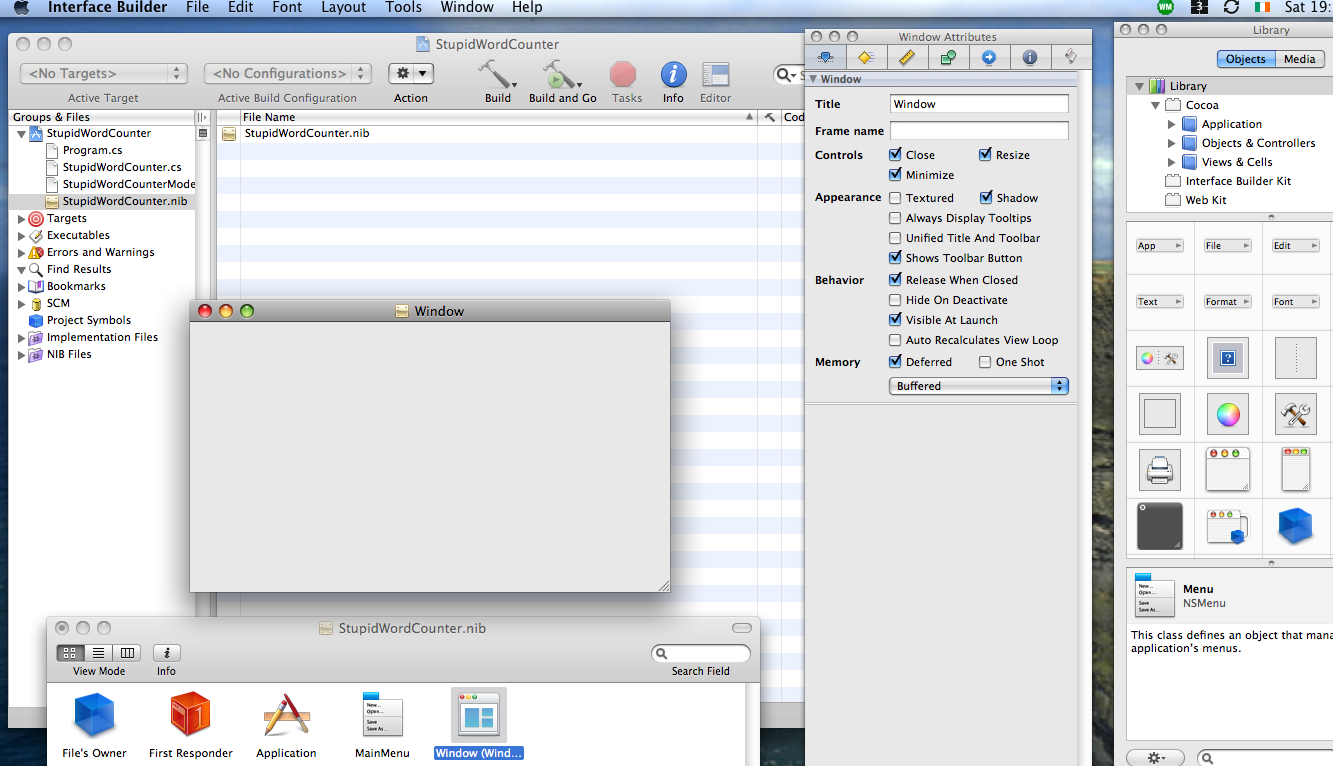
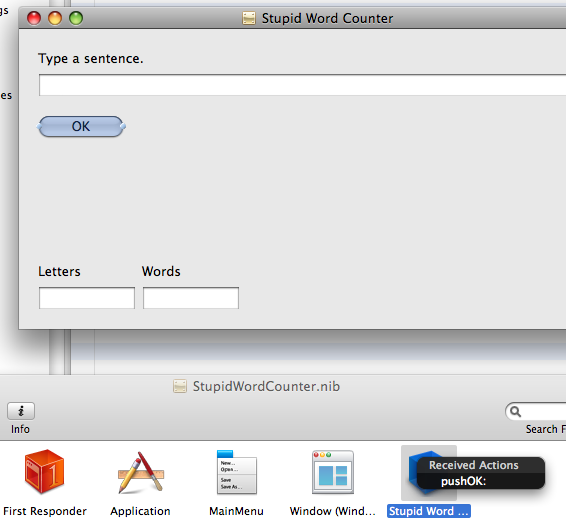
In Interface Builder modify the main window thus:
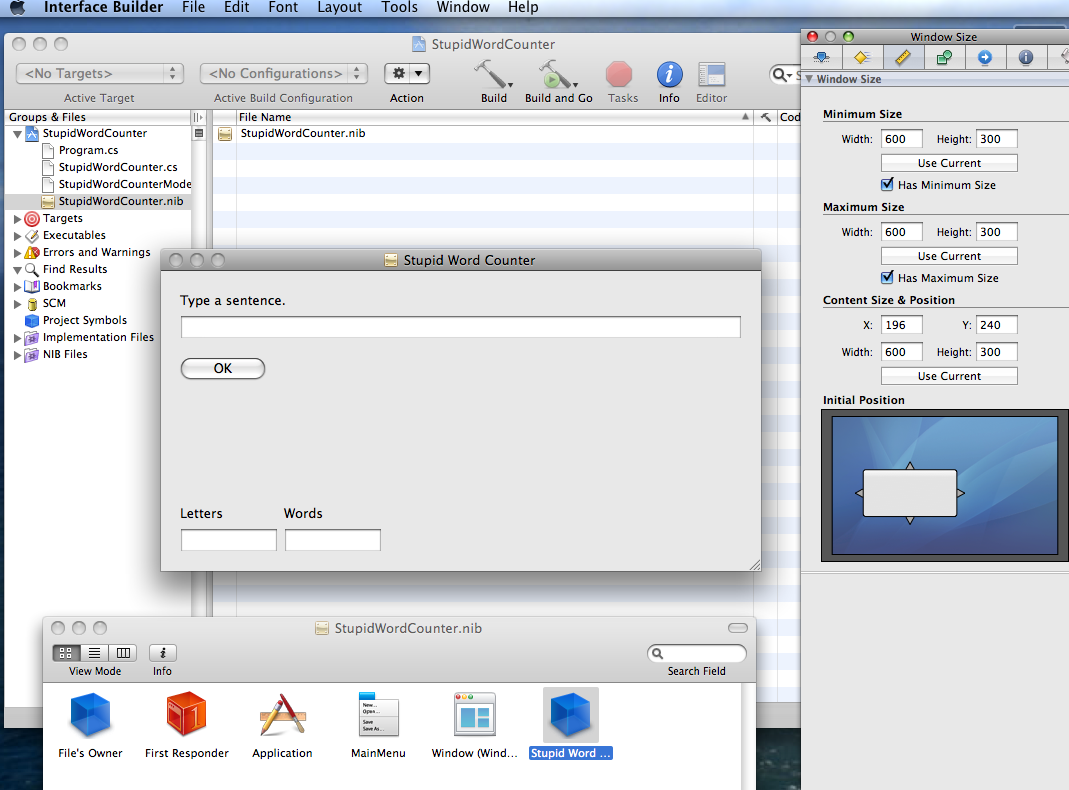
The new Cocoa GUI should look exactly like the former Windows Forms
GUI, just prettier. :-)
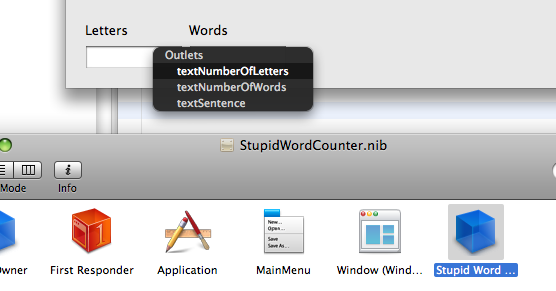
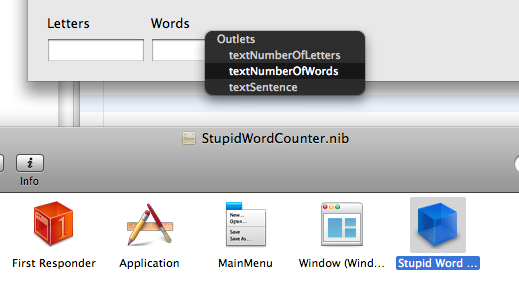
Also drag a Cocoa object (blue box) into the NIB file and define an
action and three outlets for it:
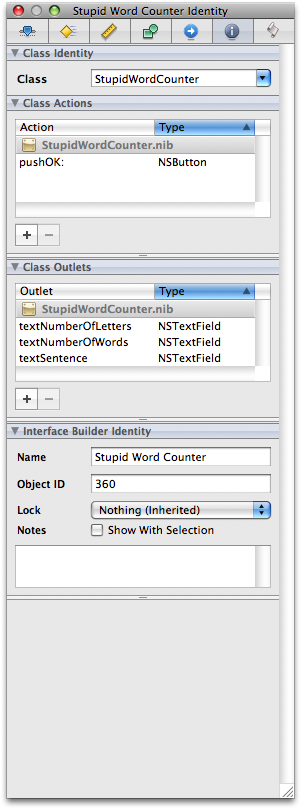
Connect the outlets and the action to the appropriate controls in the
window. (The Windows world calls text boxes and buttons "controls", the
UNIX world calls them "widgets", I think. I will stick to the Windows
terms.)
You connect outlets and actions to controls by pressing the control key
(ctrl) while dragging from the object to the control (outlets) or from
the control to the object (action).
Connect "textSentence":
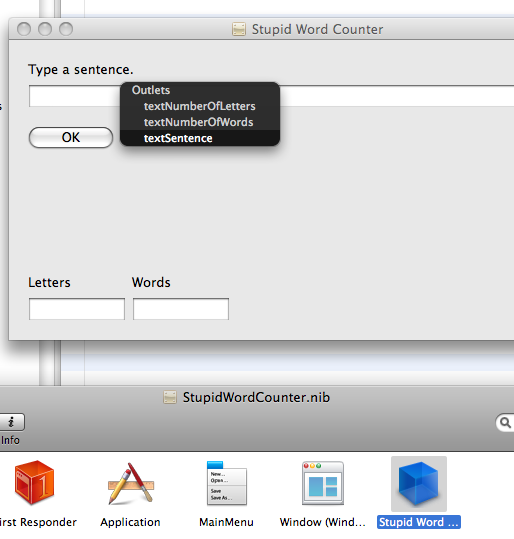
Connect "textNumberOfLetters":
Connect "textNumberOfWords":
Connect "pushOK":
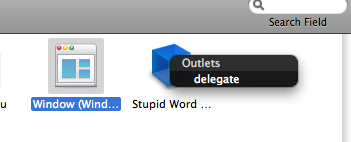
In order to allow our controller class StupidWordCounter to react to
events happening to the window (for example, we want the program to
quit then the window is being closed), our object has to be the
delegate for the window. Connect the object to the window's delegate
outlet:
If everything is done, you can close Interface Builder now (don't
forget to save the NIB file).
Step 4: Compile the Mac OS version of the
program
Open Terminal.app (in the /Applications/Utilities folder) and travel to
the project directory (where the .cs and Makefile files are).
Run "make" to build the program.
xerxes:StupidWordCounter ajbrehm$ ls
Makefile
StupidWordCounter.csproj bin
Program.cs
StupidWordCounter.nib build
Properties
StupidWordCounter.resx obj
StupidWordCounter.Designer.cs
StupidWordCounter.xcodeproj
StupidWordCounter.cs
StupidWordCounterModel.cs
xerxes:StupidWordCounter ajbrehm$ make
mcs -define:COCOA -t:exe -out:StupidWordCounter.exe -pkg:cocoa-sharp
Program.cs StupidWordCounter.cs StupidWordCounterModel.cs
rm -rf StupidWordCounter.app
macpack -m:2 -n:StupidWordCounter -o:. -a:StupidWordCounter.exe
-r:StupidWordCounter.nib
xerxes:StupidWordCounter ajbrehm$
If everything worked all right, you should now have a
StupidWordCounter.app file (actually a bundle) in your project
directory.
Doubleclick it and see the Cocoa version of the program.
Hope everything worked all right.
Please email me at andrew@netneurotic.net
if something doesn't work, or I made a mistake, or something is
unclear, or if you simply like to receive long emails about consonant
shifts between Germanic or Semitic languages or Hebrew grammar. :-)
Andrew Brehm, Dublin 20th January 2008.
Feel free to make copies of this tutorial as long as you keep my name
in it. Modifying the tutorial won't really make sense, but if you want
to, please just make sure that it is clear what was my original text
and what is your modification and keep my name in the file.
P.S.: I know the word and letter counter doesn't work correctly except
for very simple inputs. The beauty of Cocoa# is that you can fix that
problem in the model file (StupidWordCounterModel.cs) without modifying
the GUI code. Please feel free to do so!